Analog Signal Flow II: Output Devices
- Overview
- Output Devices
- Speakers
- Point Source vs. Line Array
- Coverage Principles
- Flat vs. Angled Speaker Placement
- Dispersion Plots
- Fills and Speaker Delays
- Monitors
- Readings
- Activities
Overview
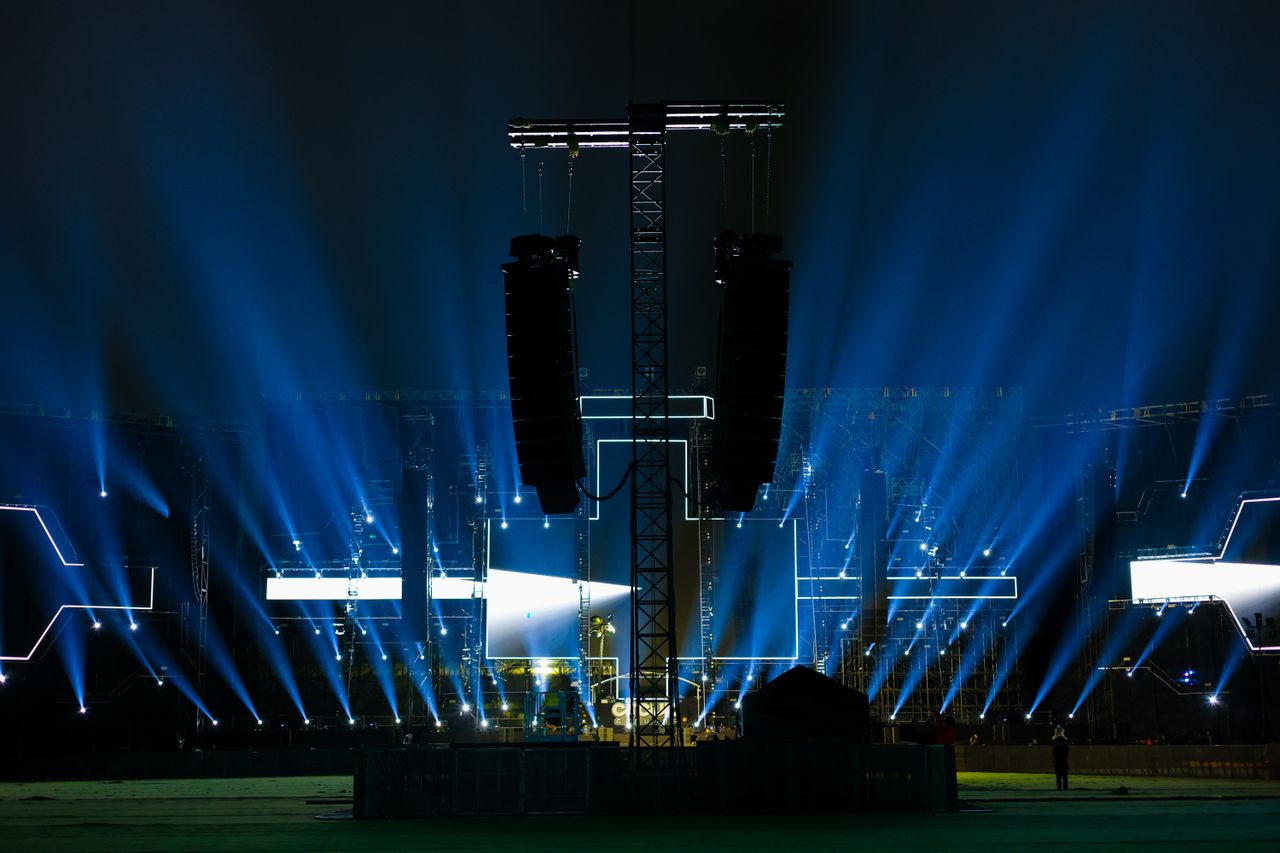
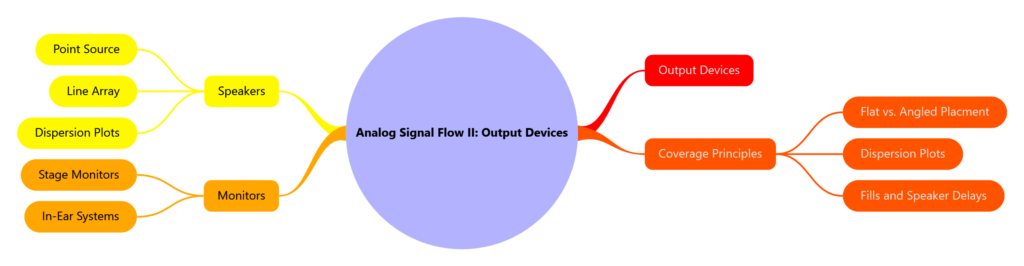
Now that we’ve covered input devices such as microphones, DI boxes, and preamps, as well as input/output devices like consoles, the final destination of the signal chain is the loudspeaker system. This module will focus on speakers, including point source and line array systems, coverage principles, and stage monitors.
Output Devices
Recall that we discussed the difference between sources and destinations. A source is the input device, such as a microphone or DI box, where the audio signal originates. Before the signal reaches its destination, it typically passes through input/output devices such as a console or outboard gear, where it can be processed and routed.
Ultimately, all sources lead to a destination, which is the output device, most commonly the loudspeaker system. However, in a live sound environment, there can be multiple destinations, including main speakers, stage monitors, in-ear monitors, and additional speakers for rear audience coverage, commonly referred to as delay speakers.
Let’s discuss how these different speaker systems are used in live sound reinforcement.
Speakers
A typical two-way live sound loudspeaker has two drivers inside the cabinet. One driver is dedicated to high frequencies, while the other driver handles low and mid frequencies. For simplicity, you can think of a driver as a “speaker within a speaker” where each driver (speaker) is designed to reproduce a specific range of frequencies.
The high-frequency driver used in professional live sound is typically called a compression driver. A horn is attached to the compression driver to control the dispersion of high-frequency sound waves, allowing for greater efficiency, higher SPL, and more consistent coverage over long distances.

The horn does not create the high frequencies; the compression driver creates the sound, while the horn shapes and directs the sound toward the audience. This is called dispersion.
The other driver is called a woofer, which uses a cone-shaped diaphragm and is responsible for reproducing low frequencies and much of the midrange in a typical two-way loudspeaker.
Point Source vs. Line Array Systems
Point Source
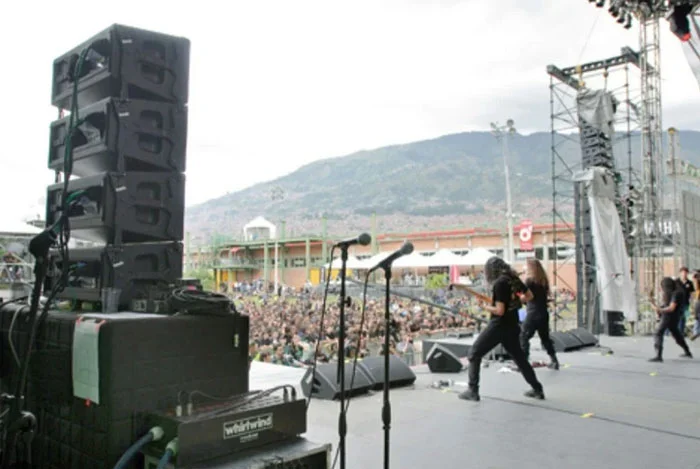
A point source system uses a single loudspeaker per side, with one main speaker for the left side and one for the right. This differs from larger line array systems, which use multiple stacked speakers to cover large venues such as stadiums and festivals.
Point source systems are simple, portable, and commonly used in smaller venues such as churches, classrooms, small clubs, and corporate events. One limitation is that sound level decreases approximately 6 dB every time the distance doubles from the speaker. This is called in the inverse square law, and important concept when speaking about coverage principles. For smaller venues, this loss is usually manageable.
Line Array
Before the year 2000, many live sound venues used a speaker system called Point Source, as discussed previously. Most of us are used to a single point sourced system where we have one speaker on the left and the other on the right transmitting sound to a single direction. However, in festivals we would often use multi point source systems where many speakers would transmit signals to multiple directions. However, this causes issues with phasing making some of the frequencies in the playback inaudible. As a solution, line array systems were invented, which are now commonly used for live sound reinforcement.
The video below discusses how the live sound industry evolved to using line array systems.
Coverage Principles
Let’s now discuss the principles behind how speakers cover a particular area and what you can and cannot hear in terms of frequency content. We will also begin exploring best practices for speaker placement, including the advantages and limitations of different placement strategies.

Flat vs. Angled Speaker Placement
Where should we place the speakers during a live event? There’s a lot that goes into speaker placement, but let’s keep it simple. The goal is to provide the most even coverage possible for the entire audience.
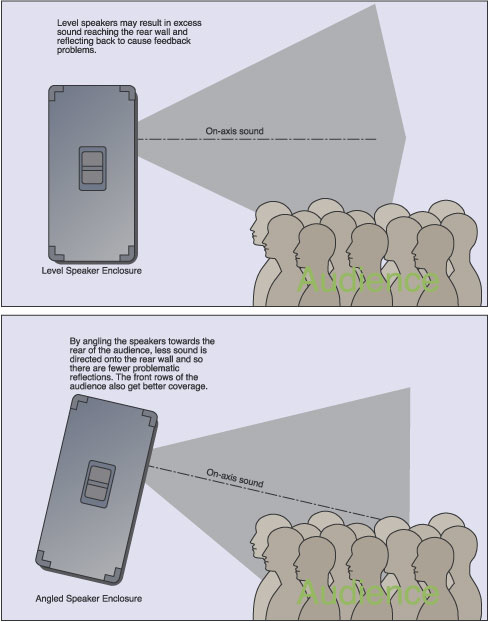
If the speakers are placed flat (without a downward angle), the speaker’s on-axis sound—the direction where the speaker sounds its best—travels over the audience and may hit the back wall in an indoor venue. This means the audience isn’t hearing the speaker at its best and may experience reduced clarity or phase issues as reflected sound from the back wall combines with the direct sound.
You might think lowering the speakers to audience ear level would solve the problem. While that improves the experience for the front audience, the people in the back may not receive the same level of coverage.
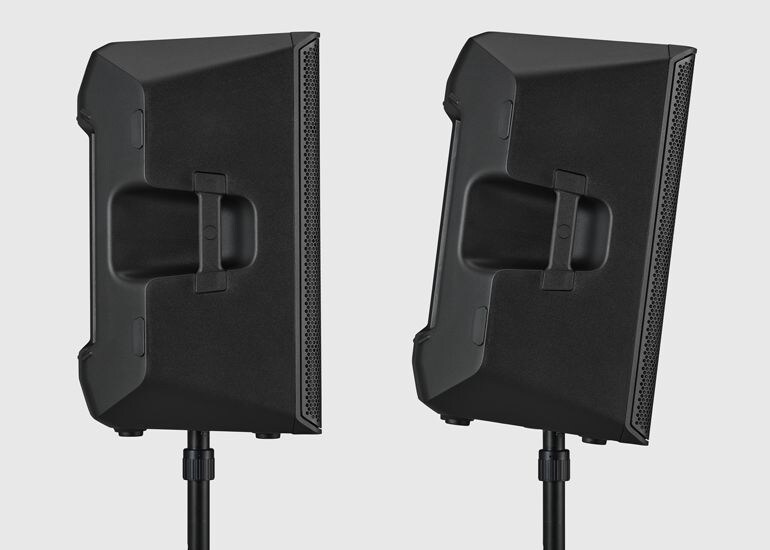
The ideal setup is to place the speakers above the audience and angle them downward. This provides more consistent coverage from the front to the back of the room. Many QSC speakers, for example, have a tilt socket on the bottom that allows the speaker to be angled when mounted on a speaker stand for this exact reason.
Finally, remember that when using a point source system (one speaker on the left and one on the right), not everyone in the audience will hear exactly the same thing. Depending on where they’re seated, some listeners may experience slight dips in certain frequencies because they’re outside the speaker’s optimal coverage pattern. This is a normal limitation of point source systems and one reason line arrays are often used for larger venues.
Dispersion Plots
To better understand which frequencies audience members hear based on where they’re sitting or standing, it’s helpful to understand dispersion plots. Simply put, a dispersion plot shows how sound spreads from a loudspeaker. Speakers have vertical dispersion (sound spreading above and below the speaker) and a horizontal dispersion (sound spreading to the left and right).
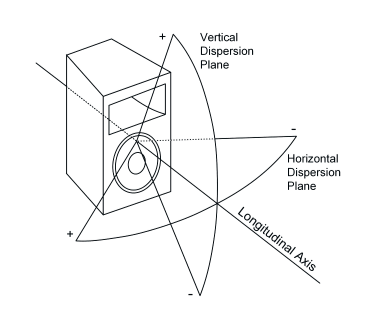
Why are dispersion plots important? They show that the best sound is heard on-axis, or directly in front of the speaker along its longitudinal axis. This is where you’ll hear the flattest frequency response and the most consistent coverage. As you move off-axis toward the sides of the speaker, certain frequencies begin to roll off, meaning you won’t hear the full frequency spectrum as accurately.
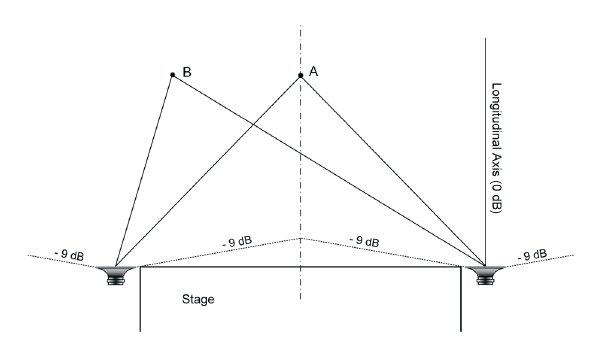
Now, look at the diagram above. If you’re standing at Point A, you’re centered between both speakers. Since the sound from the left and right speakers travels the same distance, it arrives at your ears at nearly the same time, giving you the best stereo image and the most balanced sound.
However, if you’re standing at Point B, the speaker on stage left is closer, so its sound reaches your ears first. The sound from the stage right speaker arrives slightly later. When these two signals combine, they can create phase interference, causing certain frequencies to reinforce each other while others cancel out. This results in a less accurate listening experience.
Relating this back to the dispersion plot, notice the -9 dB areas on the outer edges of each speaker’s coverage. If you’re listening from those angles, you’re no longer on-axis and will experience a reduction in some frequencies. So while using one speaker on the left and one on the right is simple, common, and likely what we’ll use for many of our events, it’s important to understand that this setup has limitations and won’t provide identical sound for every audience member.
Fills and Speaker Delays
The diagram below shows an ideal setup for a larger venue that may not have a line array system. The main speakers are aimed toward the middle audience area along their on-axis (longitudinal axis). A rear fill system is used to cover the back audience, while a front fill system covers the audience closest to the stage. This approach allows each area of the venue to have a speaker directed toward them for more consistent coverage.
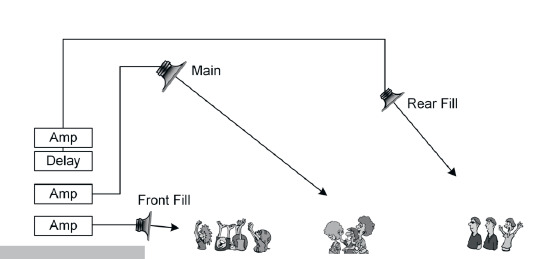
The challenge with this setup is that audience members will hear multiple speakers at different distances, which can create phase issues and affect overall sound quality. To minimize this problem, the goal is for the entire audience—whether they are in the front, middle, or rear—to hear the main speakers first, with the front fills or rear fills arriving afterward as reinforcement.
To achieve this, a short delay is added to the front fill and rear fill systems. This ensures the sound from the main speakers reaches the listener first, while the additional speakers supplement the sound and improve coverage without creating distracting phase interference.
Monitors
Stage Monitors
Stage monitors are used by artists so they can hear themselves and the rest of the band while performing on stage. In live sound reinforcement, the main audience speakers and the stage monitor system use separate mixes. The main speakers are typically placed in front of the performers to reduce the chance of feedback from stage microphones, meaning artists cannot rely on the main PA system to hear themselves.
Instead, separate speakers, usually placed on the floor and pointed toward the performers, are used. These are commonly called monitor wedges.
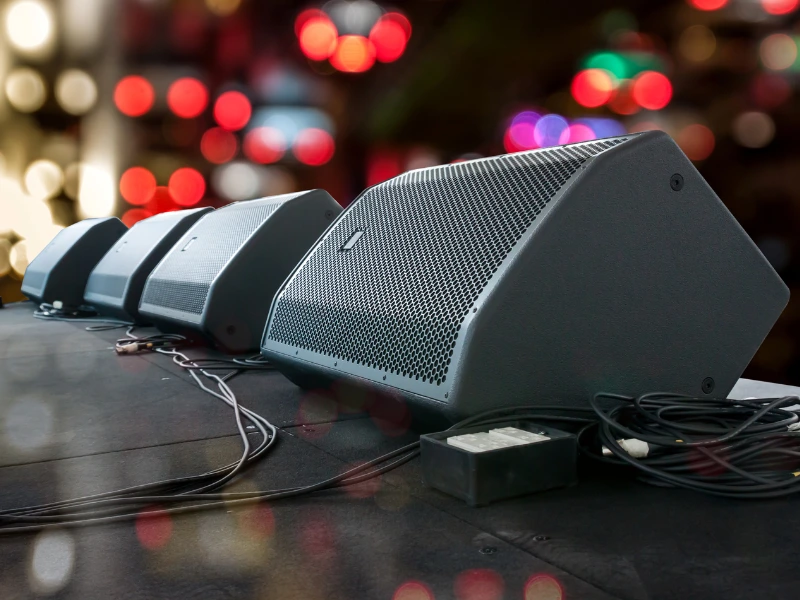
In large concert settings, multiple monitor wedges are placed across the stage, with each artist receiving a dedicated mix based on their needs. For example, a vocalist’s monitor mix may have louder vocals, while a bass player’s monitor may have more bass and rhythm instruments.
Another type of monitoring system used on larger stages is sidefills. Sidefills are larger speakers placed on the sides of the stage that provide a mix of the entire band. They are useful when performers need to move around the stage while still being able to hear themselves and the rest of the group.
In-Ear Monitors
In-ear monitoring (IEM) systems are commonly used in large concert settings and are frequently seen with professional touring artists and bands. Have you ever seen a singer remove one earbud while performing? They are usually removing one side of their in-ear monitor to hear the audience or hear the natural sound of the venue.
In-ear monitors function similarly to stage monitors, except the monitor is a small earbud instead of a loudspeaker. Artists wearing earbuds or headphones on stage are using them to hear themselves and the rest of the band.

In-ear monitors provide several advantages over traditional stage monitors. First, they reduce stage volume, which helps minimize feedback and creates a cleaner mix for the audience. In smaller venues, excessive stage volume from amplifiers, drums, and monitors can compete with the main speakers, making it harder for the audience to hear a clear mix.
The image below shows my band, Westline Drive, after performing at SFSU’s small venue, The Depot. Notice that there are no guitar amplifiers or stage monitors on stage. This was intentional because smaller stages can become loud very quickly. By using in-ear monitors, we were able to keep the stage volume low, create a cleaner mix for the audience, and still hear ourselves clearly while performing. You can see the earbuds hanging from my sweater after I removed them for the photo.

Another advantage of in-ear monitors is hearing protection. Live stages can reach very high sound levels, especially with multiple guitar amplifiers and a drum kit. In-ear monitors help reduce exposure to excessive volume while allowing performers to hear their mix clearly.
Finally, in-ear monitors allow artists to receive private cues that the audience cannot hear. For example, a band may need a click track to stay synchronized during a performance. The engineer can send the click only to the artist’s in-ear mix without sending it to the main speakers. Artists may also receive cues indicating song sections, such as when the verse, chorus, or breakdown is approaching. These cues help performers stay organized during a live performance while remaining inaudible to the audience.
Activities
Reflection
Reflections are a way of noting comments, questions, or concerns you have about this module. Please do not review the learning material. We all viewed and read the same material. Instead, offer us your personal thoughts, insights, confusions, and questions. Feel free to go beyond the learning material and find connections with your personal experiences. Please include one or two questions at the end of your document.
You can make your reflections as long as you want, but it should be a minimum of 150 words. You can also write your reflection on any word program, however it must be submitted as a PDF or as a text entry on Canvas. You can use the link below to submit your reflection.