Module 2: Analog Signal Flow I: Input Devices
- Overview
- Input Devices
- Microphones for Live Sound
- Dynamic Microphones
- Wireless Microphones
- Condenser Microphones
- Direct Boxes
- Input/Output Devices
- Consoles
- Outboard Gear
- Block Diagrams
- Activities
Overview
Now that you have an overview of what live sound reinforcement entails, it’s time to dive into one of the most fundamental concepts in audio: signal flow. Signal flow describes how audio travels from the sound source to its final destination, allowing the audience to hear the performance.
In this module, we’ll begin by exploring input devices, such as microphones and direct boxes (DIs). Next, we’ll examine input/output devices, including mixing consoles and outboard gear, and learn how they process and route audio signals. Finally, in the next module, we’ll conclude the signal flow by discussing output devices, such as loudspeakers and stage monitors.
Along the way, you’ll learn about dynamic and condenser microphones, wireless microphone systems, common microphone choices for various instruments, microphone placement techniques, digital mixing consoles, outboard equipment, and the role each device plays in a live sound system.
We’ll finish the module by examining block diagrams that illustrate how all of these components connect together in a typical concert environment, giving you a complete picture of how audio travels from the performer to the audience.
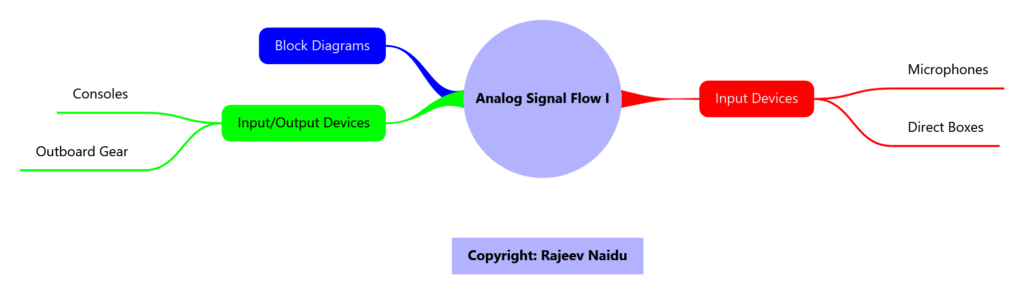
Take a look at the visual model below to see an overview of the topics covered in this module.
Input Devices
As discussed in the previous module, all signal flow begins with the sound source, and the component responsible for capturing that source is known as the input device.
You may have already guessed that a microphone is an input device, and you would be correct. The microphone is typically the first device in the audio chain because it is responsible for converting acoustic energy (sound waves) into electrical energy that can be processed by the sound system.
However, the microphone is not the only input device used in live sound.
Another important input device is the microphone preamplifier, or preamp. The preamp is responsible for taking the weak mic-level signal generated by the microphone and amplifying it to line level so that it can be processed by the rest of the audio system. In most live sound applications, preamps are built directly into the mixing console.
However, some live sound engineers choose to use external microphone preamps because of their unique tonal characteristics or sonic coloration. These are often used on important sources such as lead vocals, where engineers may want a particular sound or character. In these cases, the external preamp is located outside of the console and connected to it later in the signal chain.

Another essential input device in live sound is the direct box, more commonly referred to as a DI box. A DI box allows engineers to capture the signal directly from an instrument without the need for a microphone. DI boxes are commonly used with acoustic guitars, bass guitars, keyboards, and other electronic instruments.

Using a DI box offers several advantages. It reduces stage volume, minimizes bleed from other instruments, and often results in a cleaner and more controlled signal. Lower stage volume generally leads to greater clarity in the front-of-house mix, particularly in small and medium-sized venues where excessive onstage sound can quickly become difficult to manage.
Now that we have introduced the major input devices used in live sound reinforcement, let’s explore each of them in greater detail.
Microphones for Live Sound
Selecting microphones for live sound is different from selecting microphones for a recording studio. In the studio, the primary goal is often to capture the highest possible sound quality, even if that requires delicate microphones, multiple microphone stands, and lengthy setup times.
Live sound presents a different set of priorities.
While sound quality is certainly important, engineers must also consider durability, reliability, efficiency, and ease of setup. Live productions often involve tight schedules, limited stage space, quick changeovers between performers, and equipment that must withstand the demands of touring and frequent use.

For this reason, dynamic microphones are often preferred over more sensitive condenser microphones. Dynamic microphones are rugged, can handle high sound pressure levels, and are generally less susceptible to bleed and feedback. Engineers also favor compact microphones that clip directly onto instruments, such as tom drums, because they eliminate the need for additional microphone stands, reducing stage clutter and speeding up setup.
In some situations, the best microphone is no microphone at all. Using a direct box (DI) instead of a microphone for instruments such as bass guitars, keyboards, acoustic guitars, and synthesizers provides a clean signal while reducing bleed, minimizing feedback, and simplifying the stage setup.
Ultimately, microphone selection in live sound is a balance between achieving great sound and meeting the practical demands of a live performance. A microphone that sounds incredible in the studio may not always be the best choice on stage if it slows down setup, takes up unnecessary space, or increases the risk of feedback.
Below, you’ll learn about the differences between dynamic, condenser, and wireless microphones, when each type is most appropriate, and several common microphone techniques used for live sound reinforcement.
Dynamic Microphones
Dynamic microphones are one of the most popular microphone choices in live sound reinforcement. They are durable, reliable, and well-suited to the demands of live performance environments. Compared to condenser microphones, dynamic microphones are generally less sensitive and can handle significantly higher sound pressure levels (SPLs), making them ideal for loud sound sources such as drums and guitar amplifiers.
Their rugged construction also allows them to withstand the physical demands of touring and live events, including transportation, setup, teardown, and occasional accidental drops.
Because of these characteristics, certain dynamic microphones have become industry standards for capturing instruments during concerts and live performances.
Drums
Kick
In live sound, you will almost always see dynamic microphones used on drums, particularly for the kick drum, snare drum, and toms. These instruments produce very high sound pressure levels (SPL), making dynamic microphones an excellent choice due to their durability and ability to handle loud sources without distortion.
Some popular kick drum microphones used in live sound include the Audix D6, AKG D112, and Shure Beta 52A. These microphones are specifically designed for kick drums and are engineered to withstand the high SPLs produced by the instrument.

Their frequency responses are also tailored for kick drum applications. You’ll often find a reduction in the midrange frequencies, accompanied by boosts in the low frequencies and upper presence range. This frequency shaping helps produce the punchy low end and attack that listeners typically associate with a modern kick drum sound.
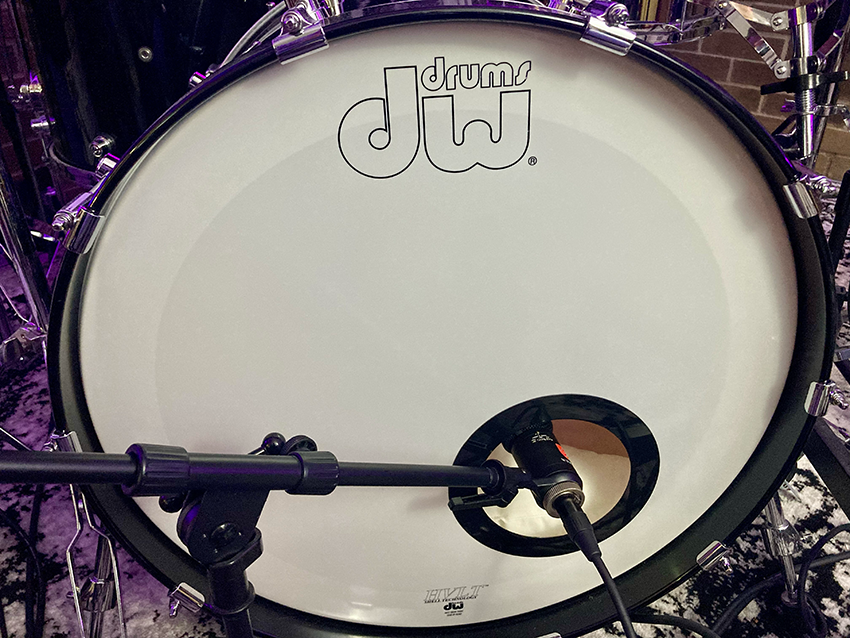
From a microphone placement perspective, many kick drums include a port, which is the hole found on the resonant (front) head of the drum. The microphone is commonly placed a few inches inside this port, which generally provides a balanced and natural kick drum sound.
As you move the microphone deeper into the drum and closer to the beater—the part of the pedal mechanism that strikes the drum head—you will typically capture more attack and high-frequency content, resulting in a brighter and more defined sound. Moving the microphone farther away from the beater generally captures more low-frequency resonance and body from the drum.
)
Neither approach is inherently correct or incorrect; the ideal placement depends on the style of music, the drummer, the sound you’re trying to achieve, and ultimately what’s convenient.
The choice is yours!
Snare
Snare drums are relatively straightforward to microphone and are often captured using similar techniques across many live sound applications.
The most common choice by far is the Shure SM57, which has become something of an industry standard for snare drum reinforcement. Engineers typically position the microphone very close to the drum head, often within an inch or two of the rim, while angling it toward the center of the drum to capture the desired balance of attack and body.

The SM57 works exceptionally well on snare drums because it can handle very high sound pressure levels without distortion and features a presence boost in the upper midrange frequencies. This helps accentuate the crack and attack of the snare, allowing it to cut through dense mixes and remain clearly audible in a live performance setting.
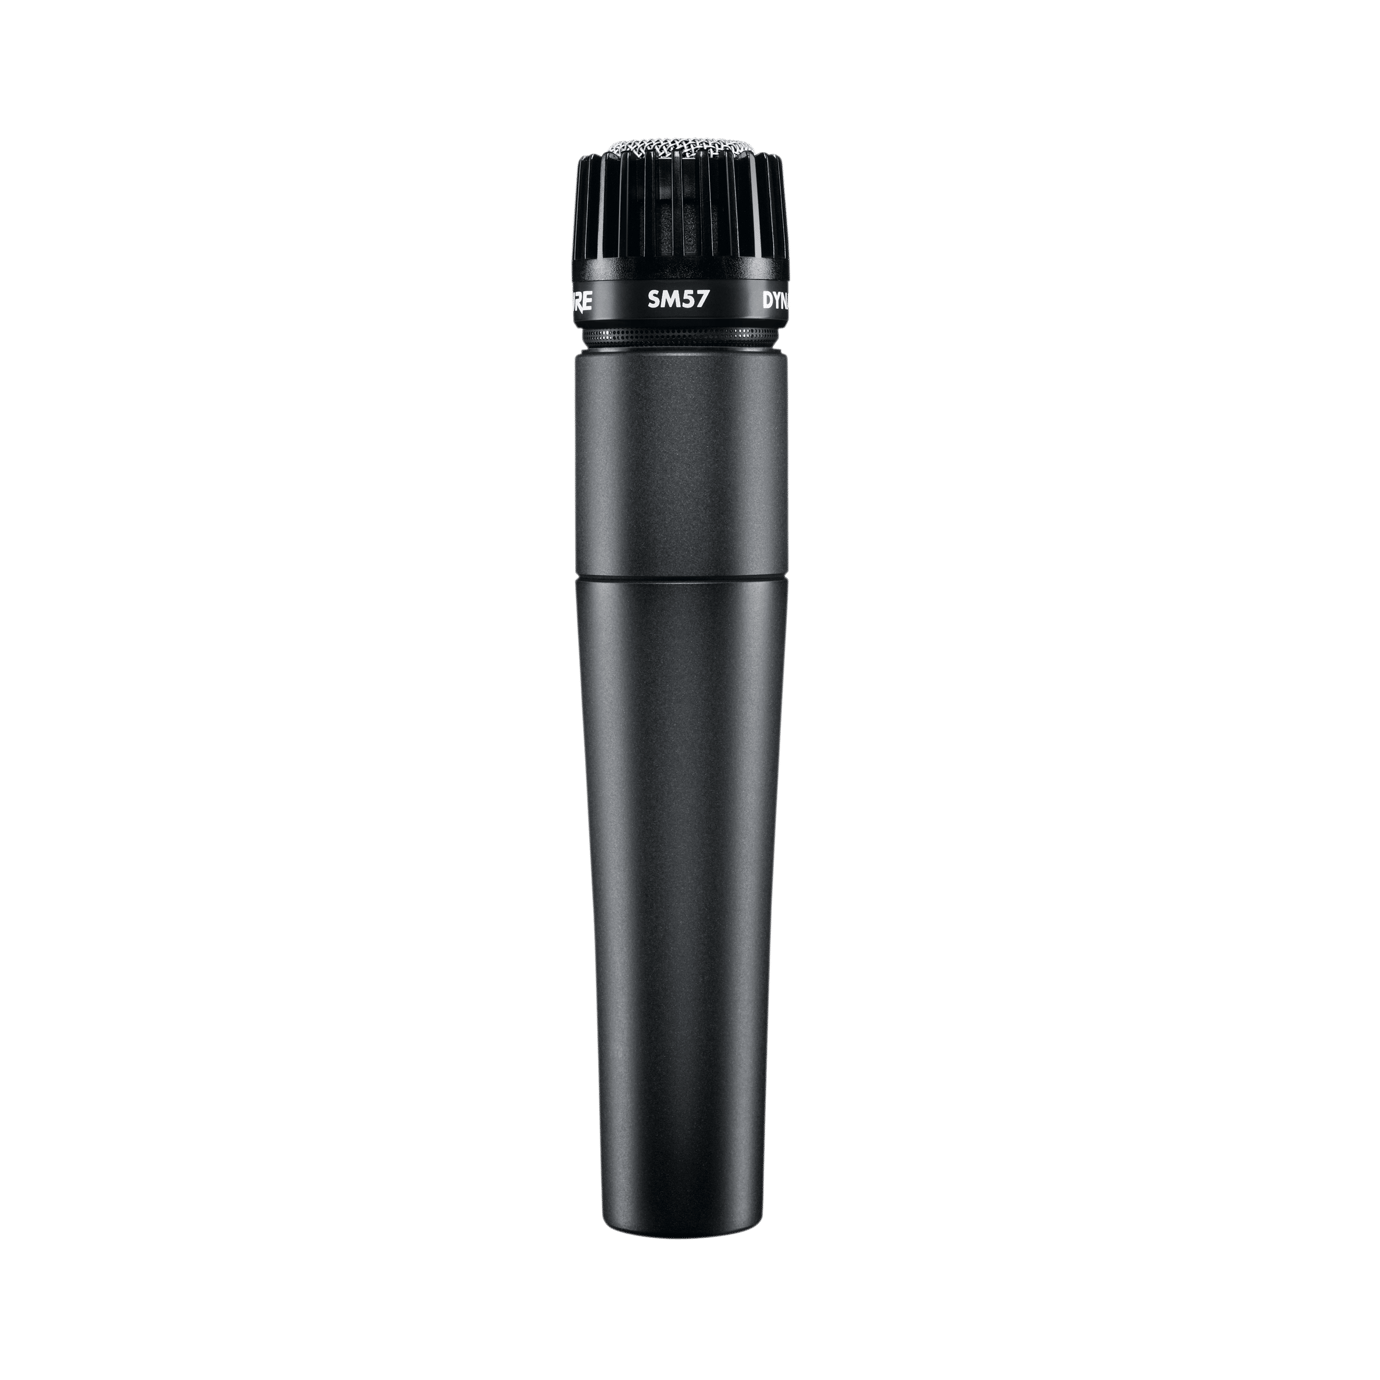
As with all microphone placement techniques, small adjustments in angle and distance can significantly affect the tone, so don’t be afraid to experiment to find the sound that best fits the music and venue.
Toms
One of the classic microphones for recording toms in the studio is the Sennheiser MD 421. The MD 421 has been a studio favorite for decades due to its excellent low-frequency response, ability to handle high sound pressure levels, and its full, natural sound on tom drums.
While the MD 421 can sound excellent in live sound applications as well, it is more commonly seen in studio environments than at live concerts. One reason for this is practicality: the MD 421 typically requires a dedicated microphone stand for each tom, which increases stage clutter and setup time.
When it comes to live sound, convenience and efficiency are important considerations. Engineers often need to set up and tear down quickly, work in tight spaces, and minimize the number of stands and cables on stage whenever possible.
For these reasons, many live sound engineers prefer microphones such as the Sennheiser e604. The e604 is compact and includes an integrated mounting clip that attaches directly to the rim of the drum, eliminating the need for additional microphone stands and significantly reducing setup time and stage footprint.
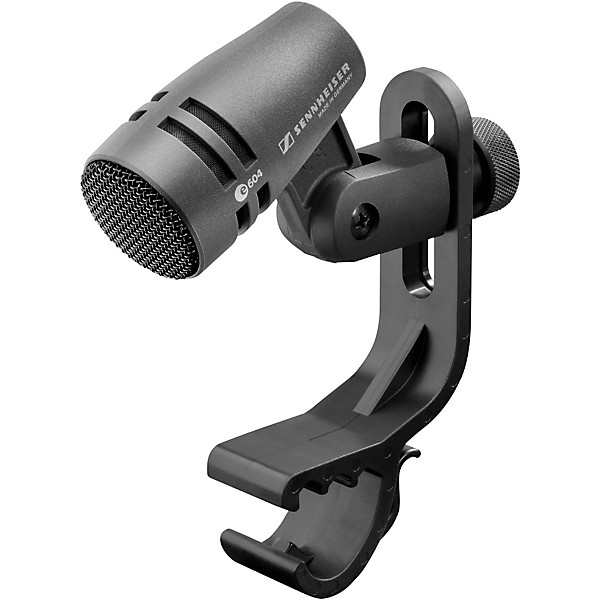
Could the MD 421 provide a slightly better sound? In some situations, perhaps. However, in live sound, efficiency, reliability, and ease of setup are often just as important as achieving the absolute best possible tone.
As with many decisions in live audio, the “best” microphone is often the one that balances sound quality with the practical demands of the show.
Guitar Amplifiers
Dynamic microphones are also the most common choice for miking guitar amplifiers, both in the studio and in live sound environments.
Two of the most popular guitar amplifier microphones are the Shure SM57 and the Sennheiser e609. Both microphones are capable of handling the high sound pressure levels produced by guitar cabinets while providing the midrange presence needed to help electric guitars cut through a mix.

When using a microphone such as the SM57, engineers will often place the microphone extremely close to the speaker grille—sometimes even touching it—and position it slightly off-center from the speaker cone.
The reason for this placement has to do with the tonal characteristics of different parts of the speaker. The center of the speaker cone, often referred to as the dust cap area, tends to produce a brighter and more aggressive sound with greater high-frequency content. While this can add clarity and definition, placing the microphone directly in the center can sometimes result in a tone that sounds overly harsh or piercing.
Moving the microphone away from the center and toward the edge of the cone generally produces a warmer and more balanced sound with increased low and mid-frequency content. Many engineers find that positioning the microphone near the edge of the dust cap provides an excellent balance between brightness and fullness.
Placing the microphone directly against the grille cloth also maximizes the amount of direct sound being captured while minimizing bleed from other instruments on stage.

With microphones such as the Sennheiser e609, you will often see the microphone suspended directly in front of the speaker by its cable and draped over the top of the amplifier cabinet, eliminating the need for a microphone stand altogether.
Once again, this comes back to one of the recurring themes in live sound engineering: efficiency and stage management. Reducing the number of microphone stands and minimizing stage clutter can speed up setup times, improve sight lines, and make life easier for both engineers and performers.
Vocals
Whether you work in audio or not, there’s a good chance you’ll come across a Shure SM58 at some point in your life. It is one of the most recognizable and widely used microphones in the world and has become an industry standard for live vocals.
The SM58 is extremely popular in live sound because it is durable, reliable, and designed specifically with vocal applications in mind. Its frequency response is tailored to complement the human voice, with a gentle reduction in the low frequencies and a presence boost in the upper midrange. This helps vocals sound clear, intelligible, and capable of cutting through a busy mix.
Another advantage of the SM58 is its built-in spherical grille and pop filter, which help reduce plosive sounds such as “P” and “B” consonants. Without this protection, these sounds can create unwanted bursts of low-frequency energy that may sound distracting or abrasive through a sound system.
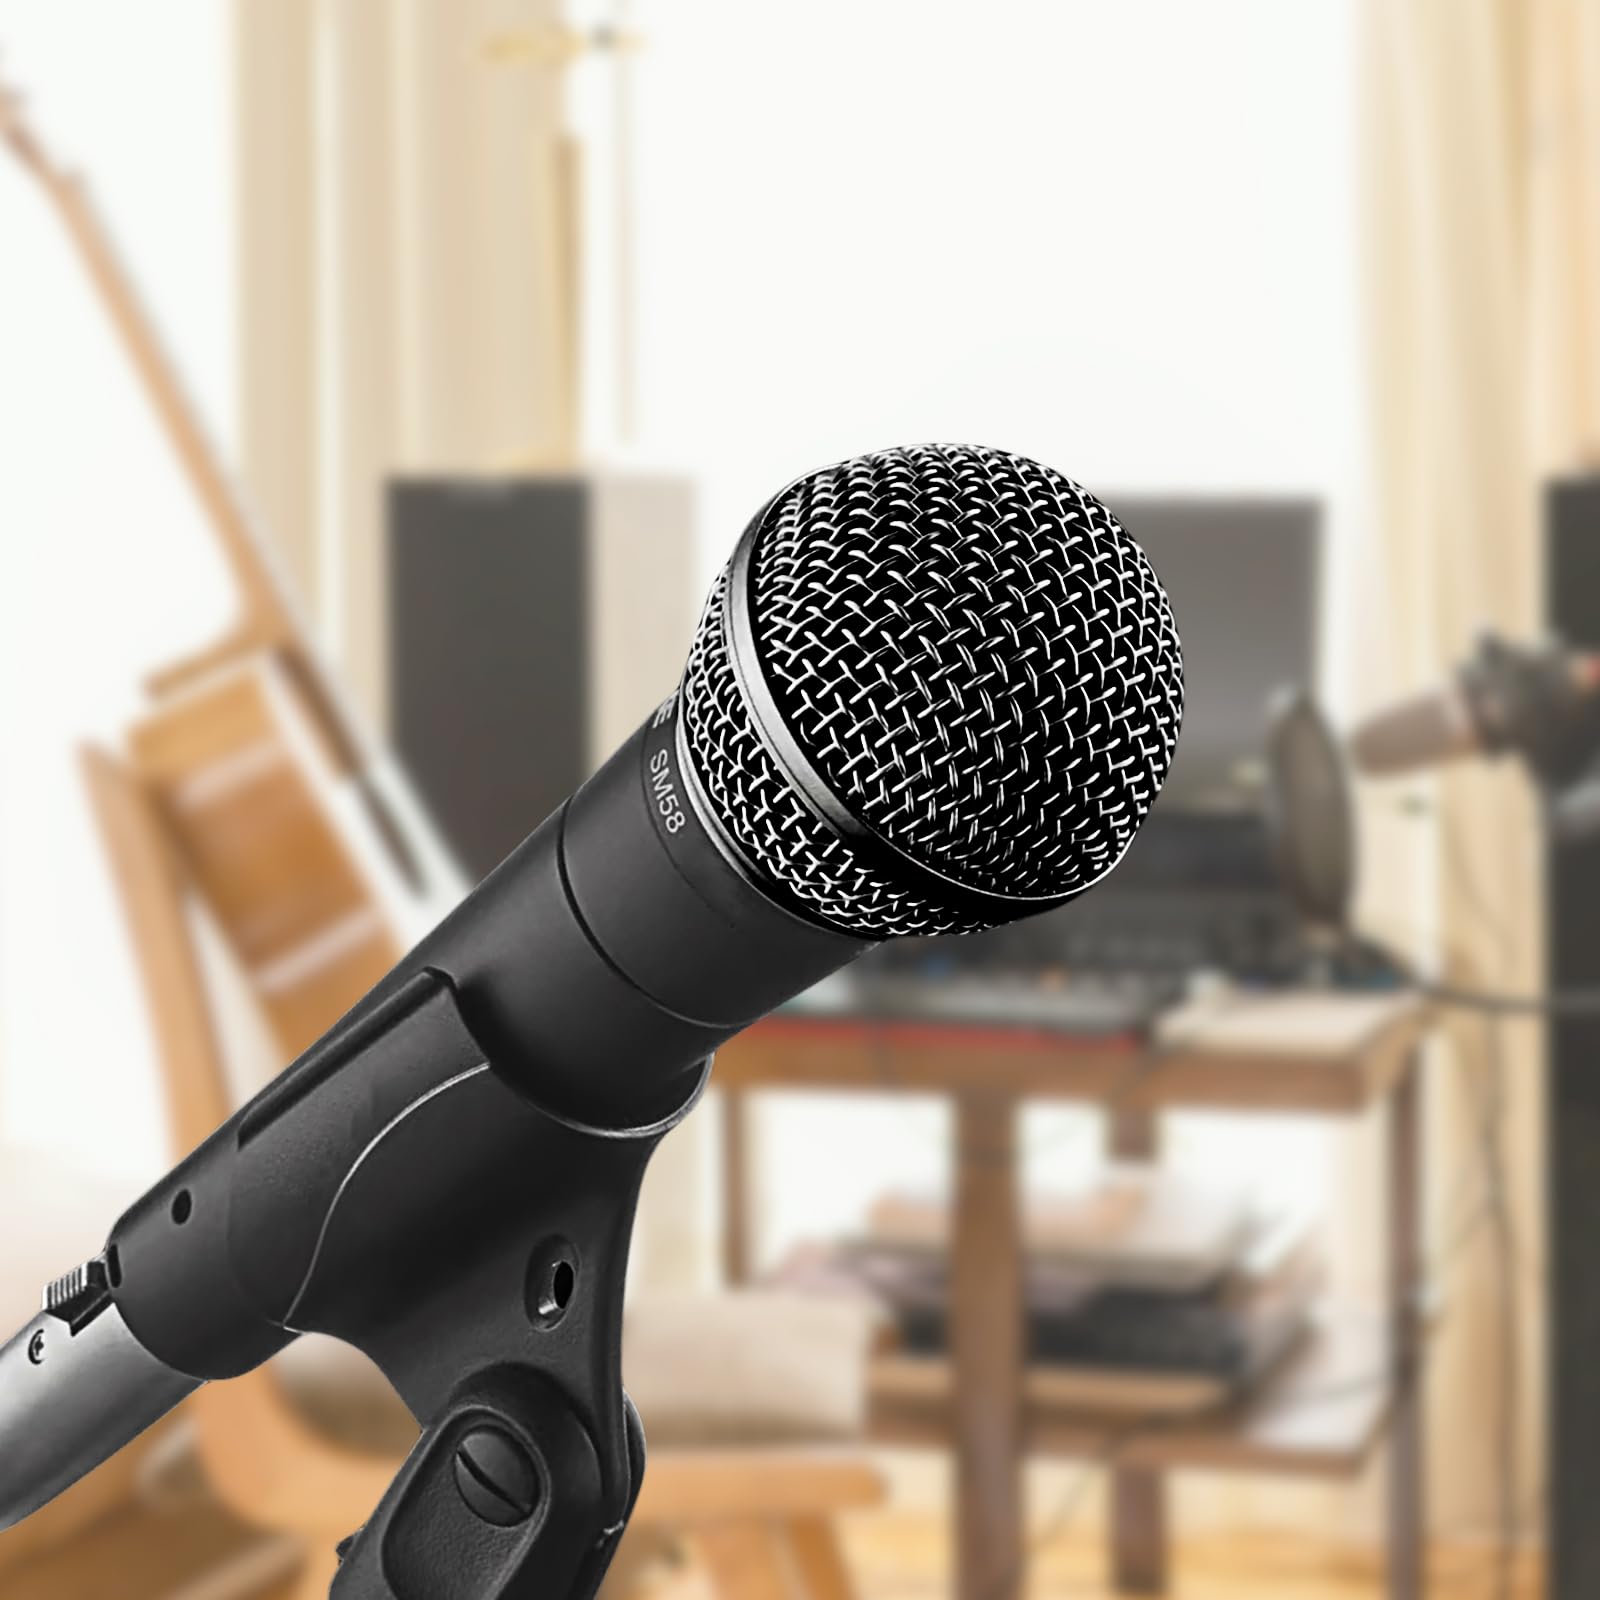
The microphone’s cardioid polar pattern also helps reject sound coming from the rear of the microphone, reducing bleed from nearby instruments and improving feedback rejection when stage monitors are being used.

While there are many excellent vocal microphones available today, the SM58 remains a trusted choice for countless live sound engineers and performers around the world. If there were a “default” microphone for live vocals, the SM58 would probably be it.
Wireless Microphones
You’ll also commonly see wireless microphones being used on stage, particularly in larger concert productions, theater performances, corporate events, and broadcast applications.
One of the major advantages of wireless systems is that they allow performers to move freely around the stage without being restricted by microphone cables. This added mobility can improve stage presence and create a more engaging performance for the audience.
Many professional wireless systems use interchangeable microphone capsules, allowing engineers and artists to change the sound and characteristics of the microphone without changing the transmitter body itself. This provides flexibility in selecting a capsule that best complements a particular vocalist or application.
One of the most widely used professional wireless systems is the Shure Axient Digital system. The system consists of several major components, including transmitters, receivers, and antennas.
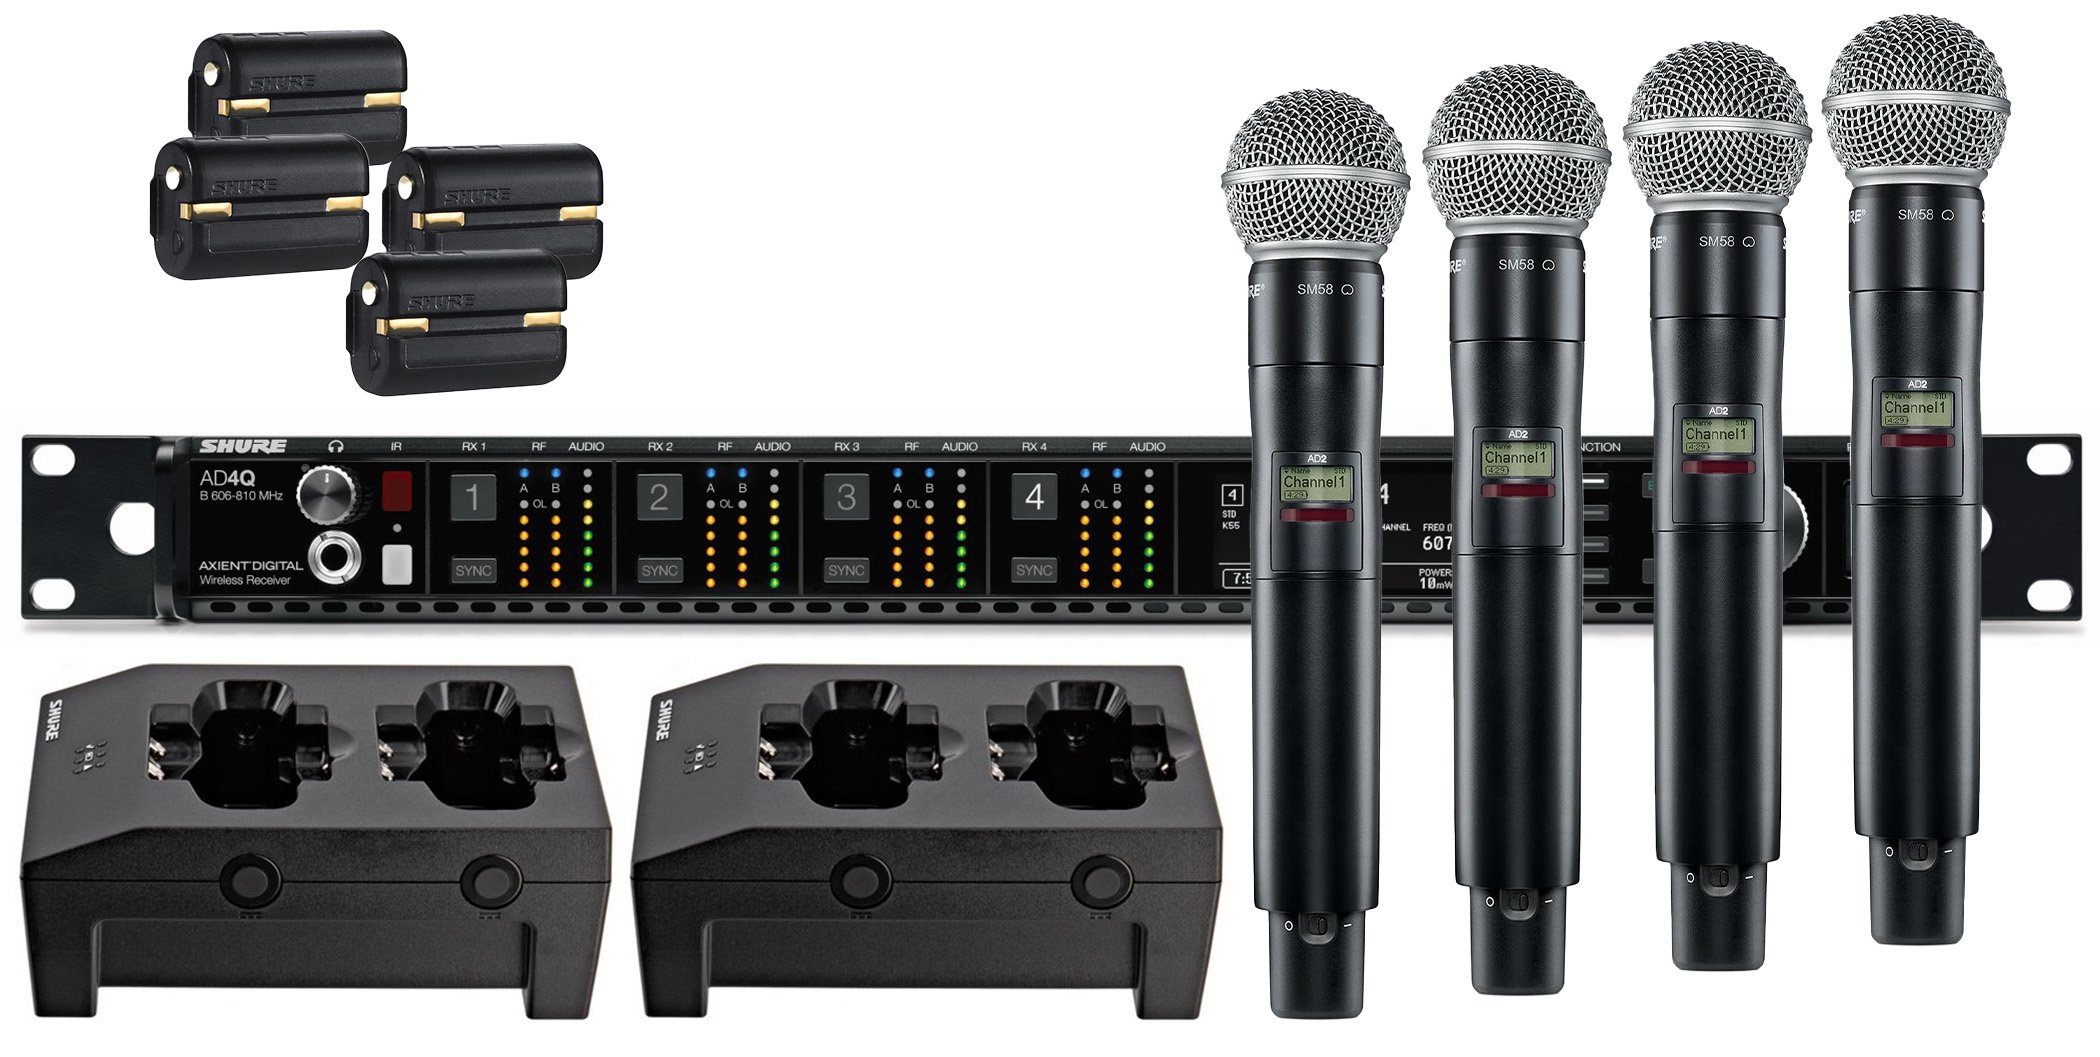
The transmitter is the handheld microphone or bodypack worn by the performer. It contains a built-in radio transmitter that converts the audio signal into a radio frequency (RF) signal and sends it wirelessly through the air.
The receiver captures this RF signal and converts it back into an audio signal that can be sent to the mixing console. Once the signal reaches the console, the front-of-house engineer can adjust levels, EQ, dynamics processing, effects, and monitor sends just as they would with any wired microphone.
Professional wireless systems also use specialized antennas and RF distribution equipment to improve signal reliability and reduce the possibility of dropouts or interference, particularly in large venues where dozens or even hundreds of wireless channels may be operating simultaneously.
The video below provides an overview of how professional wireless microphone systems operate and offers a closer look at the technology commonly used in modern concert productions and large-scale live events.
Condenser Microphones
Depending on the concert and the style of music being performed, you may occasionally see condenser microphones used in live sound applications.
Condenser microphones are known for their clarity, detail, and extended frequency response. They are generally more sensitive than dynamic microphones, allowing them to capture subtle nuances and high-frequency content exceptionally well. However, that increased sensitivity can also present challenges in live environments.
Because condenser microphones pick up more ambient sound, they are more susceptible to bleed from nearby instruments and can increase the likelihood of feedback, particularly when stage monitors are being used. For this reason, live sound engineers are often selective about where and when they choose to use condenser microphones during a performance.
One of the most common applications for condenser microphones in live sound is drum overheads, where engineers typically use small diaphragm condenser microphones (SDCs).
Small diaphragm condensers are the slender, “cigar-shaped” microphones commonly seen positioned above a drum kit. Their lightweight diaphragms respond very quickly to sound waves, allowing them to reproduce transient detail and high frequencies with exceptional accuracy. This makes them particularly well suited for capturing cymbals and the overall image of the drum kit.

Overhead microphones are typically used as a stereo pair positioned above the drums to capture the kit as a whole, with particular emphasis on the cymbals and stereo image of the performance.
There are many different overhead microphone techniques, but in live sound environments, engineers commonly use a spaced pair configuration, where two microphones are positioned several feet apart and roughly three feet above the drum kit. Other techniques, such as X/Y, may also be used depending on the application and the engineer’s preference.

Some popular small diaphragm condenser microphones used for drum overheads include the Neumann KM 184, Audix SCX1, and Shure SM81.
It’s important to remember that simply placing microphones on a drum kit does not mean they must be included in the front-of-house mix.
In smaller venues, acoustic drums are often loud enough on their own that only the kick drum requires reinforcement through the main loudspeakers. In these situations, overhead microphones and close microphones on the snare and toms may be used exclusively for recording, livestreaming, or in-ear monitor mixes rather than for the audience mix itself.
As with many aspects of live sound, the decision depends on the venue, the style of music, the stage volume, and the needs of the performance.
You can check out the video below of Linkin Park’s Colin Brittain explaining his live drum setup. While he does not specifically discuss microphone techniques, this video provides a great visual example of how a professional touring drum kit is prepared for a large concert production.
Direct Boxes (DI)
In my experience, direct boxes (DI boxes) are one of the most useful tools in live sound. While microphones are excellent for capturing acoustic sound sources, they are also susceptible to bleed from other instruments and can increase the likelihood of feedback, particularly when stage monitors are being used.
A direct box, or DI, allows an engineer to capture an instrument’s signal without using a microphone. Rather than placing a microphone in front of an amplifier or acoustic instrument, the instrument is connected directly to the DI box, which then sends the signal to the mixing console.

DI boxes are commonly used with bass guitars, acoustic guitars, keyboards, synthesizers, and other electronic instruments.
One of the primary functions of a DI box is signal conversion.
As discussed earlier, microphone preamps are designed to receive a mic-level signal, which is a relatively weak electrical signal. Their job is to amplify that signal up to line level.
The challenge is that many electronic instruments already produce a line-level (or instrument-level) signal. If you were to connect one of these sources directly into a microphone preamp without the proper input or circuitry, you could easily overload the input and introduce unwanted distortion.
A DI box solves this problem by converting the instrument’s signal into a balanced, mic-level signal that can be safely connected to a microphone preamp. This allows the console to amplify and process the signal just as it would with a microphone.
Beyond signal conversion, DI boxes offer several additional advantages. Because they eliminate the need for a microphone in front of an amplifier, they reduce stage clutter, minimize bleed from other instruments, and virtually eliminate the possibility of microphone feedback from that source. They also allow for longer cable runs with less susceptibility to noise and interference.
When mixing live sound, I recommend using a DI box whenever it’s appropriate. They provide a cleaner signal, simplify stage setup, and often make it easier to achieve a clear, controlled mix.
Input/Output Devices
Input and output devices are components that can both receive and transmit audio signals. These devices act as both a source and destination within the signal flow chain.
A common example is a mixing console. The console receives signals from input devices such as microphones and DI boxes, processes and adjusts the audio, then sends the signal to output devices such as speakers and monitors.
Other examples include outboard gear, such as compressors, EQs, and effects processors, which receive a signal, modify it, and pass it along to the next stage of the system.
Consoles
The mixing consoles used in recording studios and those used for live sound are designed with different priorities in mind. While both perform the essential task of routing, processing, and mixing audio, most professional live sound systems today rely on digital mixing consoles because of the flexibility and efficiency they provide.
Scenes (Digital Consoles)
One of the greatest advantages of a digital console is its ability to store and recall scenes. A scene is essentially a snapshot of the console’s settings. This includes microphone preamp gains, EQ settings, compressors, gates, effects, monitor mixes, routing, mute groups, and many other parameters.
For example, if multiple bands are performing at a festival, the front-of-house engineer can save a separate scene for each band during soundcheck. When it’s time for the next performance, the engineer can recall the appropriate scene with the press of a button, allowing the console to instantly load the correct settings. This dramatically reduces setup time and helps ensure consistency from one performance to the next.
Digital Signal Processing
Another major advantage of digital consoles is their built-in digital signal processing (DSP). Most modern consoles include high-quality effects processors such as reverbs, delays, compressors, gates, graphic equalizers, and parametric EQs. Rather than connecting several pieces of external outboard equipment, engineers can access these processors directly within the console, simplifying setup while reducing the amount of equipment that must be transported and maintained.

Despite these advantages, outboard equipment still has a place in professional live sound. Some engineers prefer specific external microphone preamps, compressors, equalizers, or reverbs because of their unique sonic character and the subtle tonal qualities they bring to a mix. Although modern digital consoles continue to improve, certain analog processors remain highly regarded and are difficult to replicate exactly with digital emulations.
For these reasons, professional live sound engineers often combine the convenience and flexibility of digital consoles with carefully selected outboard equipment when a particular sound or workflow is desired.
Outboard Gear
Although modern digital consoles include excellent built in processing, many professional live sound engineers, especially those mixing major touring artists in arenas and stadiums, still rely on outboard equipment to achieve their desired sound.
One common use for outboard gear is microphone preamplifiers. Engineers may use high end preamps from manufacturers such as Neve or API to add warmth, depth, and character to a vocalist’s microphone before it reaches the mixing console. These preamps are often chosen for their unique sonic qualities and are frequently reserved for the lead vocal, the most important source in the mix.
Engineers may also use external equalizers and compressors to further shape and control the vocal sound. While digital consoles have excellent onboard processing, some analog processors have a distinctive sound that many engineers continue to prefer for high profile live performances.
Another piece of outboard equipment commonly found at front of house is a dedicated hardware reverb. One of the most respected units in the live sound industry is the Bricasti M7, which is renowned for its exceptionally realistic reverbs and natural ambience. It is often used primarily on lead vocals, although additional units may also be used on other instruments depending on the production.
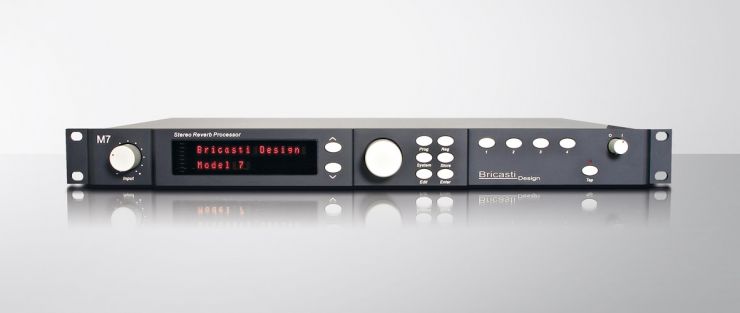
Some engineers rely heavily on outboard processing, while others prefer to work almost entirely within the digital console. There is no universally “correct” approach. Each engineer develops a workflow based on personal preference and the needs of the production.
A great example is Toby Francis, the longtime front of house engineer for the Red Hot Chili Peppers. Unlike many engineers who mix on digital consoles, Francis has continued to use an analog mixing console paired with an extensive collection of outboard processors. His setup reflects both his personal mixing philosophy and the sound he has developed with the band over many years.
The video below offers a behind the scenes look at Toby Francis’s front of house workflow and demonstrates how professional engineers integrate analog consoles and outboard equipment into large scale concert productions.
Block Diagram
Now that we understand the different components used as input devices, such as microphones and DI boxes, as well as equipment that functions as both an input and output device, such as mixing consoles and outboard gear, it’s time to see how these pieces of equipment are connected in a typical live sound system.
One of the easiest ways to understand signal flow is through a block diagram. Rather than focusing on every individual cable and connector, block diagrams provide a simplified visual representation of how audio travels from the source to its final destination.
As you’ll see, every piece of equipment has a specific role in the signal chain. Understanding how these components connect together will make troubleshooting, system setup, and operating a live sound system much easier.
Let’s take a look at a block diagram that illustrates the signal flow of a typical live sound concert system.
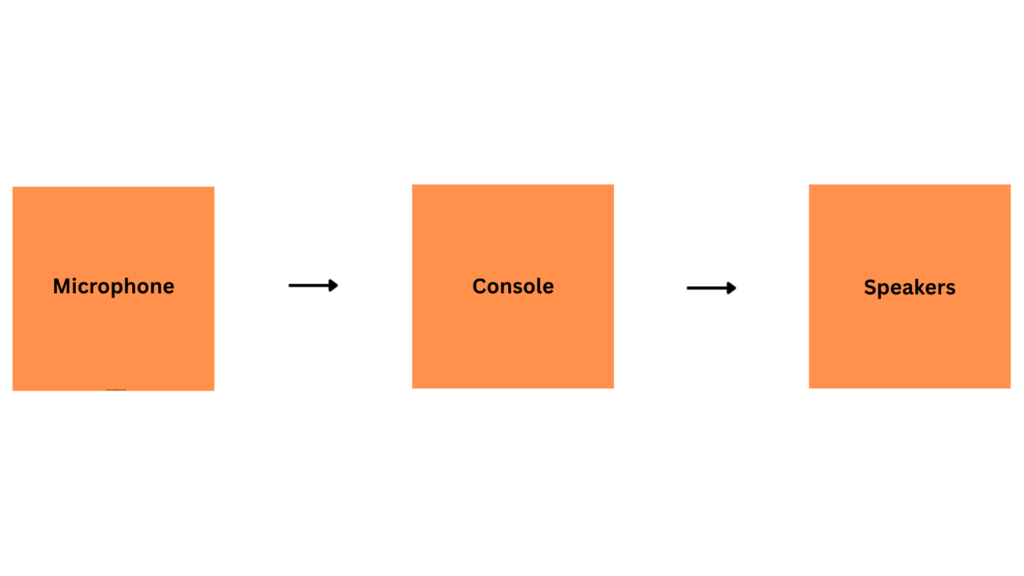
This block diagram illustrates the most basic signal path in a live sound reinforcement system: the microphone captures the sound source, the console receives and processes the signal, and the speakers reproduce the amplified sound for the audience.
This simple signal path forms the foundation of all live sound reinforcement systems. As systems become more advanced, additional input, output, and input/output devices may be included into the signal chain, such as signal processors, equalizers, compressors, effects units, amplifiers, and stage monitors. Despite these added components, the underlying principle of signal flow remains the same: the audio signal travels from the source (input device), through the processing chain (input/output device), and ultimately to the loudspeakers for sound reinforcement (output device).
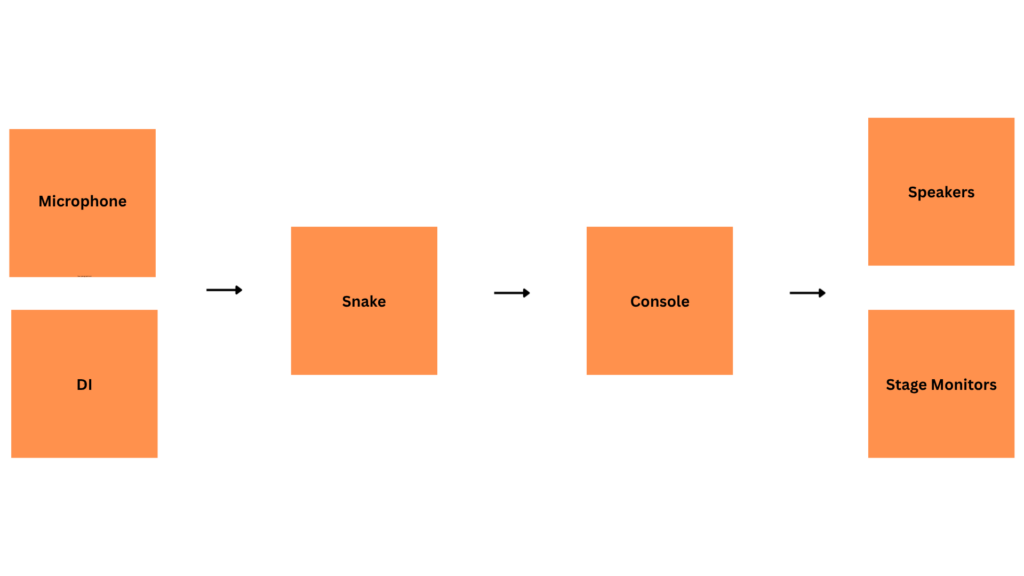
This block diagram illustrates a more typical live sound reinforcement signal path. A microphone and a DI box are connected to an audio snake, which provides efficient cable management by allowing multiple microphones to connect to a single stage snake that then connects to the Front of House (FOH) console, which may be located 50 feet or more from the stage.
The console then routes audio to two destinations: the main speakers for the audience and the stage monitors for the performers. Stage monitors are speakers aimed toward the performers, allowing them to hear themselves and the rest of the performance clearly while on stage.
Guided Notes
The Guided Notes activity requires students to write and submit their notes about the topic. The notes should include the topics covered in the presentation section of the module with definitions, explanations of diagrams, and personal thoughts. Students can either submit a PDF document if notes were taken on a computer, or they can take a picture of notes taken by hand.